Managing a colostomy bag at home can feel overwhelming at first—but please know, you’re not alone. Whether you’re caring for yourself or a loved one, it’s completely normal to feel nervous, unsure, or even a bit scared. This journey might be new, but with the right guidance and a little practice, it gets easier—truly.
Knowing how to empty a colostomy bag the right way is not just about keeping things clean. It’s about protecting your health, preserving your dignity, and feeling confident in your daily routine. A little care goes a long way in preventing discomfort, leaks, or infections.
In this blog, we’ll walk you through everything—how to empty a colostomy bag, what tools you’ll need, hygiene tips, emotional support, and expert-backed advice. By the end, you’ll feel more prepared, less anxious, and empowered to handle this with calm and care.
You’re doing great already—let’s take the next step together.
Understanding What a Colostomy Bag Is
What Is a Colostomy?
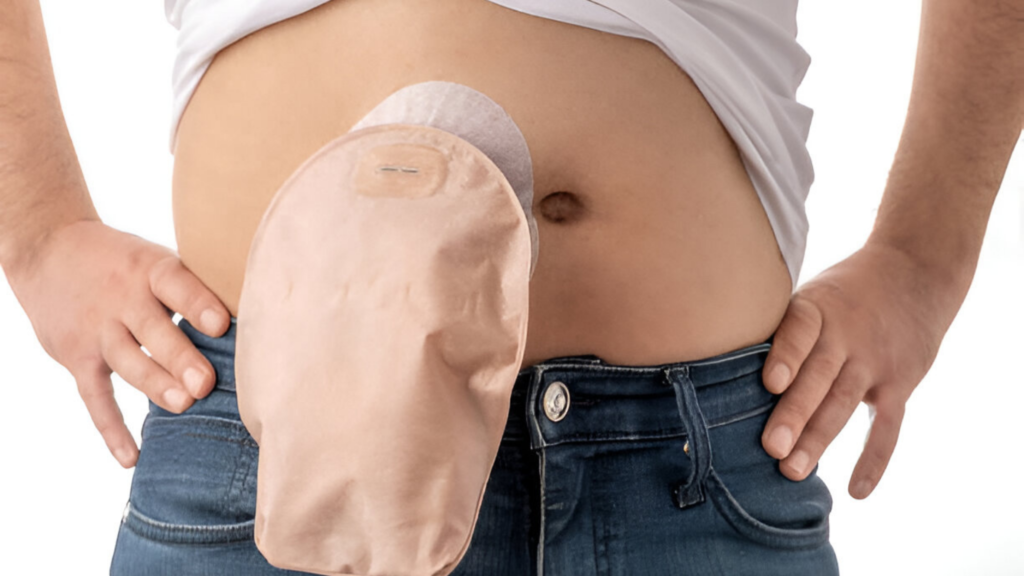
A colostomy is a surgical opening made on your belly, called a stoma, that lets waste leave your body when your lower digestive system can’t do its job the usual way. Sometimes, health issues like bowel disease, injury, or cancer make this necessary. It might sound scary, but this change is actually life-saving—it helps you stay healthy and comfortable when your body needs a little extra help.
Think of it as a new path your body uses to do what it always did, just a different route. Many people who have a colostomy go on to live full, happy lives. And yes, learning how to empty a colostomy bag properly is a big part of making this new routine feel natural and safe.
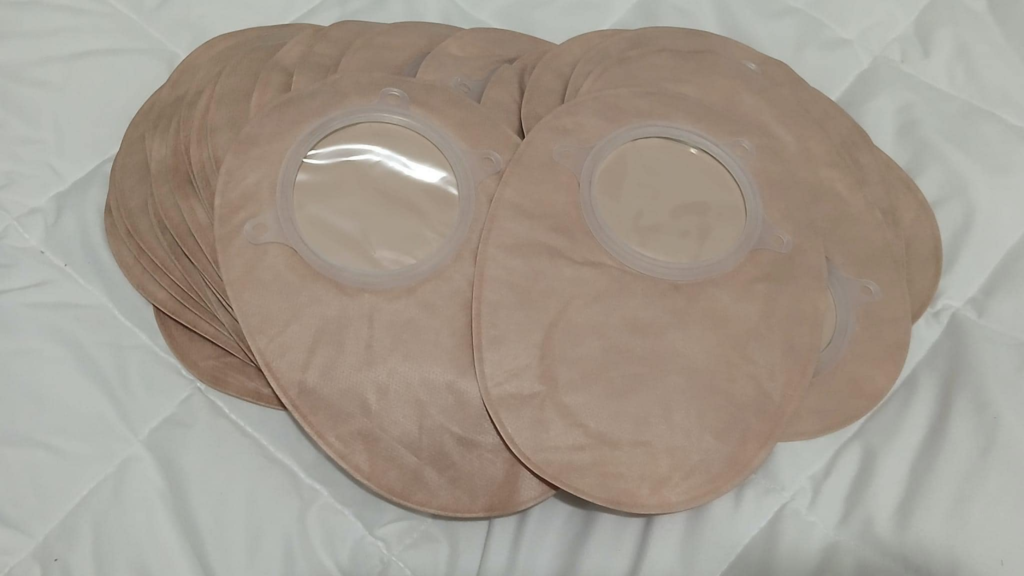
Types of Colostomy Bags
Now, when it comes to colostomy bags, there isn’t just one kind. Knowing the differences can help you choose what feels right and makes care easier.
One-piece system: This is where the bag and the skin barrier (the part that sticks to your skin around the stoma) come as one unit. It’s simple to use and change all at once. Many find it convenient for everyday use.
Two-piece system: Here, the bag and the skin barrier are separate. The bag attaches securely to the barrier with a ring or adhesive. This can be helpful if you want to change the bag without removing the skin barrier each time, which might protect sensitive skin.
There are also different ways the bags work on the inside:
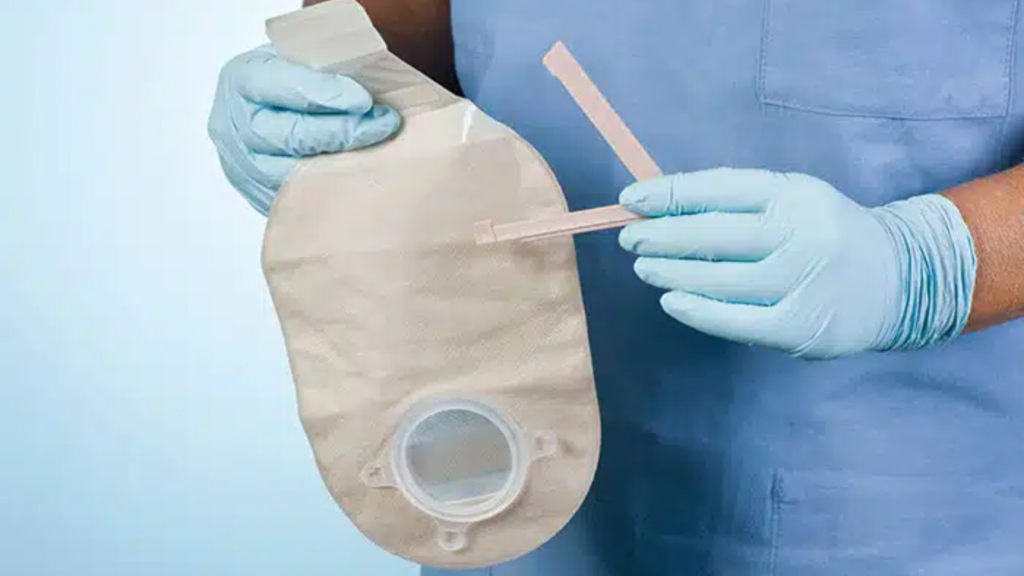
Drainable bags: These have a small opening at the bottom with a clip or valve. You can empty the waste without removing the bag, which means less frequent changes and more comfort.
Closed-end bags: These are sealed at the bottom and meant to be removed and replaced once full. They’re often used when the output is more solid or less frequent.
Knowing how to empty a colostomy bag correctly, especially a drainable one, is key to staying comfortable and preventing leaks or skin problems. With practice, this will become a smooth part of your day.
Preparing to Empty a Colostomy Bag at Home
When Should You Empty It?
One of the most important things to know about how to empty a colostomy bag is when the right time is to do it. Waiting too long can lead to leaks or skin irritation, which nobody wants. The best rule of thumb is to empty the bag when it’s about one-third to one-half full. This way, the bag stays comfortable and less likely to pull on your skin or burst unexpectedly.
Emptying too early might feel like extra work, but it’s better to be safe than sorry. Remember, a full bag can get heavy and cause discomfort or embarrassing leaks. By emptying regularly, you help protect your skin and keep yourself feeling fresh and confident all day long.
Supplies You’ll Need
Before you start learning how to empty a colostomy bag safely, it helps to have everything ready. Having your supplies close by will make the process smoother and less stressful. Here’s a simple list of what you’ll need:
Gloves: Wearing disposable gloves helps keep everything clean and protects you from germs.
Tissue or soft wipes: These are perfect for gently cleaning around the bag opening and wiping your hands or any spills.
Disposal bag: Use a small plastic bag or bio-waste bag to safely throw away waste and used wipes.
Mild soap and warm water: Washing your hands before and after is very important. Mild soap keeps your skin healthy and prevents irritation.
Optional: Some people like to use deodorizing sprays or tablets designed for colostomy bags. These help reduce any odors and keep you feeling more comfortable, especially when out and about.
Having these ready before you start will help you feel calm and prepared. It’s like having your own little care kit—everything you need to keep yourself safe and clean while learning how to empty a colostomy bag at home.
Step-by-Step Guide: How to Empty a Colostomy Bag Safely
Step 1 – Wash Your Hands Thoroughly: Before you do anything else, take a moment to wash your hands really well. Clean hands are your best defense against infections. Think of this step as protecting your body and keeping everything healthy. Use warm water and mild soap, and don’t rush—sing your favorite song or count to 20 to make sure your hands are super clean. When learning how to empty a colostomy bag, this is the very first and most important step.
Step 2 – Choose a Comfortable Spot: Next, find a spot where you feel comfortable and relaxed. Most people prefer the bathroom because it offers privacy and makes cleaning up easy. Having good lighting and a flat surface nearby to keep your supplies helps a lot too. When you feel at ease, the process becomes less stressful and more natural.
Step 3 – Put on Gloves and Prepare Supplies: Now, put on disposable gloves to keep things clean and safe. Gather all your supplies—gloves, wipes, disposal bag, and anything else you need—and keep them within arm’s reach. This way, you won’t have to rush around or touch things unnecessarily while you empty the bag. Staying organized helps build your confidence in how to empty a colostomy bag without worry.
Step 4 – Open the Bag and Drain Contents Slowly: Gently open the drain spout or undo the clip at the bottom of your colostomy bag. Take your time to drain the contents slowly into the toilet or a designated container. Being gentle helps prevent splashing, which can be uncomfortable and messy. Remember, this is your body’s new way of doing its job, and with each step, you’re getting more skilled.
Step 5 – Clean the Bag Opening: Once the bag is empty, use tissue or soft wipes to carefully clean the opening. This keeps the area fresh and helps prevent any odors. A clean bag opening also reduces the risk of irritation around your stoma. Treat this step like you’re caring for a precious part of yourself—because you are.
Step 6 – Seal the Bag SecurelyAfter cleaning, make sure to close the bag tightly. If your bag has a clip or valve, secure it so there’s no chance of leaks. Also, take a quick look to check for any signs of wear or damage on the bag. If it looks worn out, it might be time to replace it. A well-sealed bag means peace of mind and comfort as you go about your day.
Step 7 – Dispose of Waste Properly: Place any waste, used tissues, or wipes into your disposal bag. It’s important to never flush colostomy waste or wipes down the toilet, as this can cause blockages. Seal the disposal bag tightly and throw it away in the trash. Handling waste carefully keeps your home clean and safe for you and everyone around you.
Step 8 – Wash Hands Again: Finally, wash your hands again thoroughly, just like at the beginning. This step closes the loop on hygiene and keeps you protected from germs. When you follow these steps each time, you’re mastering how to empty a colostomy bag safely and confidently—one small step at a time.
Tips to Make the Process Easier
Create a Routine: One of the best things you can do for yourself or your loved one is to build a simple routine around how to empty a colostomy bag. When something becomes a habit, it starts to feel more natural—and less scary. Try emptying the bag at the same times each day, like after meals or before going to bed. Over time, you’ll feel more in control, and the stress or anxiety you may have felt at the beginning will start to fade. Think of this routine as a small act of self-care—it’s your way of saying, “I’ve got this.”
Use Odor Control Products: Worried about smell? You’re not alone—many people feel this way. Luckily, there are special deodorizing drops, sprays, or tablets made just for colostomy bags. They help keep things fresh and make you feel more confident, especially in public places or during social gatherings. It’s a small thing that can make a big emotional difference. When you’re learning how to empty a colostomy bag, adding a deodorizer to your routine can make the entire experience feel more comfortable and private.
Keep a Travel Kit Ready: Life doesn’t stop after a colostomy. You can still travel, go out with friends, and enjoy your daily routine—just a little more prepared. Keep a small travel kit with you at all times. It can include an extra colostomy bag, gloves, wipes, a disposal pouch, and some odor-control products. Knowing that you’re ready for any surprise gives you peace of mind wherever you are. Once you’ve practiced how to empty a colostomy bag at home, you’ll feel much more confident doing it while on the go, too.
Common Mistakes to Avoid
When you’re just learning how to empty a colostomy bag, it’s natural to make a few mistakes. But the good news? Most of them are easy to fix with a little awareness and care. Let’s walk through a few common ones—so you can avoid them and feel more confident every day.
Waiting Too Long to Empty: One of the most common mistakes is waiting until the bag is too full—maybe because you’re unsure, or maybe because life gets busy. But letting it fill more than halfway can cause pressure on the seal, leading to leaks, discomfort, or even embarrassing accidents. It’s best to empty the bag when it’s about one-third to half full. This makes the process easier and much more comfortable. If you’re trying to figure out how to empty a colostomy bag without stress, starting early and regularly is a simple but powerful step.
Ignoring Skin Irritation: If the skin around your stoma starts feeling sore, red, itchy, or raw—please don’t ignore it. Even mild irritation can turn into something more serious if left untreated. The skin around the stoma is delicate and deserves gentle care. Try using mild soap and warm water when cleaning, and always pat dry—never rub. If irritation doesn’t go away or keeps coming back, it’s important to talk to a medical professional. You deserve comfort, not pain, and your skin needs to be healthy for the bag to fit and work properly.
Reusing Disposable Gloves or Incomplete Cleaning: We’ve all been tempted to reuse things to save time or resources—but when it comes to colostomy care, hygiene is everything. Disposable gloves are made for one-time use only. Reusing them can spread bacteria and cause infections. Also, make sure you clean the opening of the bag well after each emptying. Don’t rush it. Use soft tissue or wet wipes to gently wipe away any residue. Learning how to empty a colostomy bag includes understanding how to keep things clean—not just for the sake of appearance, but for your health and peace of mind.
Emotional Challenges & How to Cope
Living with a colostomy bag can bring more than just physical adjustments—it can stir up deep emotions, too. And that’s okay. You might feel nervous, embarrassed, or even a little lost in the beginning. But you’re not alone, and there are ways to cope, heal, and grow stronger through it.
A. You’re Not Alone
First things first—you’re truly not alone.
So many people, just like you, have walked this path. Some were scared at first. Some felt frustrated. Some cried in the shower or avoided going out. All of those feelings are normal.
If you’re feeling anxious about how to empty a colostomy bag, or you’re worried that something might go wrong—you’re not weak. You’re human. It’s a big change, and it takes time to get used to.
But remember this: millions of people around the world are living full, happy, active lives with a colostomy. And you will, too.
B. Talk to a Nurse or Support Group
One of the best things you can do for yourself? Talk to someone.
Whether it’s a home care nurse, a friend who understands, or a support group online or in your city—sharing what you’re going through helps lighten the emotional load.
You don’t have to figure out everything alone. If you’re unsure about how to empty a colostomy bag the right way, or if you just want someone to talk to who gets it, reach out. No question is too small. No fear is silly.
Support groups can be especially powerful. They remind you that healing isn’t just physical—it’s emotional, too. And connecting with others can be a source of strength, laughter, and hope.
C. Empowerment Through Independence
Learning how to empty a colostomy bag on your own might feel like a chore at first. But with time, it becomes something else—it becomes a source of independence.
Each time you clean the bag, each time you step out with confidence, each time you don’t need someone’s help—you’re reclaiming control. You’re proving to yourself that you can do this. And that’s something to be proud of.
This little routine becomes a reminder that you are strong. That your life isn’t limited. That you are more than your condition.
When to Call a Nurse or Doctor
Let’s be real for a moment—caring for a colostomy bag takes patience, courage, and daily effort. While most days will go just fine once you get the hang of how to empty a colostomy bag, there are times when you might notice something unusual. And when that happens, it’s always better to speak up than to wait.
This section is here to gently guide you on when you should reach out to a nurse or doctor. Not to scare you—but to protect you. Because your health and peace of mind matter.
1. Unusual Discharge or Foul Odor
It’s normal for stool in your colostomy bag to have a smell. But if that smell suddenly becomes very strong or unpleasant in a new way—even after cleaning and sealing the bag properly—it could mean there’s an issue.
Also, if you notice a change in the color, texture, or consistency of the discharge that seems strange to you, don’t ignore it. Trust your gut. You know your body better than anyone.
Even if you’ve followed all the steps on how to empty a colostomy bag correctly, something inside could be off. And your nurse or doctor is there to help—not to judge.
2. Skin Rash or Irritation Around the Stoma
The skin around your stoma is delicate. It should stay clean, dry, and free from pain. But if you start noticing redness, a rash, itching, or any kind of burning feeling—especially if it gets worse over time—it’s a sign to call for help.
Sometimes, even small leaks or using the wrong type of cleaning products can irritate the skin. And while learning how to empty a colostomy bag the right way helps reduce these risks, it’s still possible to need extra care or advice.
A nurse can guide you on better skin protection techniques or recommend creams and supplies that suit your skin type.
3. Leakage from the Bag or Appliance
Leakage is one of the most stressful things anyone with a colostomy can face. It can feel embarrassing, uncomfortable, and just plain frustrating.
If your colostomy bag is leaking—even a little—or if it’s not sticking to your skin properly, don’t keep struggling alone. It’s not your fault. It could be due to the bag size, the shape of your stoma, or just wear and tear over time.
A trained nurse can help you find the right fit or try different brands that may work better for you. And most importantly, you deserve to feel secure and confident every day.
4. Severe Discomfort or Emotional Distress
Let’s not forget the emotional side of all this. If you’re in pain, or if something just doesn’t feel right—don’t ignore it.
And if you’re feeling overwhelmed, sad, or even hopeless about handling this change in your life, you need to know this: reaching out is an act of strength, not weakness.
Many people feel scared when they first learn how to empty a colostomy bag, especially if they’re doing it at home. But emotional support is just as important as medical care. Whether it’s speaking to a nurse, a counselor, or a loved one, please know that it’s okay to ask for help.
Conclusion
Learning how to empty a colostomy bag may seem overwhelming at first—but trust me, it gets easier. With a little practice, the right supplies, and a calm mindset, this task becomes just another part of your routine. It’s okay to feel nervous in the beginning. What you’re doing is something incredibly brave, and it shows how much you care—whether for yourself or someone you love.
Please remember: you are not alone in this journey. If at any point you feel confused, worried, or simply need a helping hand, VCare@Home is here for you. We offer expert stoma and colostomy care at home in Chandigarh, Mohali, and Zirakpur—so you can feel supported every step of the way.
You’ve already come so far. Be proud of that. And never hesitate to reach out when you need help with how to empty a colostomy bag or anything else.
FAQs Section
Q1: How often should I empty a colostomy bag?
A: Ideally, when it is 1/3 to 1/2 full—this helps prevent leaks and discomfort.
Q2: Can I flush colostomy bag contents down the toilet?
A: It’s not recommended. Always use a disposable liner or bio-waste disposal method.
Q3: What if the bag leaks at night?
A: Consider using a larger-capacity night bag or emptying before bedtime. Contact a nurse if it happens often.
Q4: Is it safe for caregivers to handle colostomy bags at home?
A: Yes, with proper hygiene and training. Home nursing services can guide caregivers through the process.
Q5: Can odor be completely eliminated?
A: With good hygiene, proper bag use, and deodorizing products, odor can be significantly reduced.
Q6: What if I feel embarrassed or emotionally overwhelmed?
A: It’s natural. Talking to support groups or seeking counseling can help. You’re not alone.
Check Out Our New Blogs!
[{"id":2758,"link":"https:\/\/vcareathome.com\/blogs\/medication-management-mistakes-elderly","name":"medication-management-mistakes-elderly","thumbnail":{"url":"https:\/\/vcareathome.com\/wp-content\/uploads\/2025\/06\/Medication-Management-Mistakes-That-Can-Harm-the-Elderly.jpg","alt":"Medication Management Mistakes That Can Harm the Elderly"},"title":"Medication Management Mistakes That Can Harm the Elderly","author":{"name":"Admin","link":"https:\/\/vcareathome.com\/blogs\/author\/admin"},"date":"Jun 17, 2025","dateGMT":"2025-06-17 06:35:43","modifiedDate":"2025-06-17 06:35:44","modifiedDateGMT":"2025-06-17 06:35:44","commentCount":"0","commentStatus":"closed","categories":{"coma":"<a href=\"https:\/\/vcareathome.com\/blogs\/category\/medication-management\" rel=\"category tag\">Medication Management<\/a>","space":"<a href=\"https:\/\/vcareathome.com\/blogs\/category\/medication-management\" rel=\"category tag\">Medication Management<\/a>"},"taxonomies":{"post_tag":"<a href='https:\/\/vcareathome.com\/blogs\/tag\/medication-management' rel='post_tag'>Medication Management<\/a>"},"readTime":{"min":16,"sec":6},"status":"publish","excerpt":""},{"id":2744,"link":"https:\/\/vcareathome.com\/blogs\/tracheostomy-tube-sizes-types-home-care","name":"tracheostomy-tube-sizes-types-home-care","thumbnail":{"url":"https:\/\/vcareathome.com\/wp-content\/uploads\/2025\/06\/Tracheostomy-Tube-Types-Sizes-Home-Care-Guide.png","alt":"Tracheostomy Tube Types, Sizes & Home Care Guide"},"title":"Tracheostomy Tube Types, Sizes & Home Care Guide","author":{"name":"Admin","link":"https:\/\/vcareathome.com\/blogs\/author\/admin"},"date":"Jun 11, 2025","dateGMT":"2025-06-11 05:39:19","modifiedDate":"2025-06-11 06:12:58","modifiedDateGMT":"2025-06-11 06:12:58","commentCount":"0","commentStatus":"closed","categories":{"coma":"<a href=\"https:\/\/vcareathome.com\/blogs\/category\/tracheostomy-care\" rel=\"category tag\">tracheostomy care<\/a>","space":"<a href=\"https:\/\/vcareathome.com\/blogs\/category\/tracheostomy-care\" rel=\"category tag\">tracheostomy care<\/a>"},"taxonomies":{"post_tag":"<a href='https:\/\/vcareathome.com\/blogs\/tag\/tracheostomy-tube-sizes' rel='post_tag'>Tracheostomy Tube Sizes<\/a>"},"readTime":{"min":14,"sec":16},"status":"publish","excerpt":""},{"id":2642,"link":"https:\/\/vcareathome.com\/blogs\/how-to-empty-a-colostomy-bag-at-home","name":"how-to-empty-a-colostomy-bag-at-home","thumbnail":{"url":"https:\/\/vcareathome.com\/wp-content\/uploads\/2025\/06\/How-to-Empty-a-Colostomy-Bag-at-Home-Safely.png","alt":"How to Empty a Colostomy Bag at Home Safely"},"title":"How to Empty a Colostomy Bag at Home Safely","author":{"name":"Admin","link":"https:\/\/vcareathome.com\/blogs\/author\/admin"},"date":"Jun 3, 2025","dateGMT":"2025-06-03 11:52:27","modifiedDate":"2025-06-05 09:54:48","modifiedDateGMT":"2025-06-05 09:54:48","commentCount":"0","commentStatus":"closed","categories":{"coma":"<a href=\"https:\/\/vcareathome.com\/blogs\/category\/colostomy-bag\" rel=\"category tag\">Colostomy Bag<\/a>","space":"<a href=\"https:\/\/vcareathome.com\/blogs\/category\/colostomy-bag\" rel=\"category tag\">Colostomy Bag<\/a>"},"taxonomies":{"post_tag":"<a href='https:\/\/vcareathome.com\/blogs\/tag\/how-to-empty-a-colostomy-bag' rel='post_tag'>How to empty a colostomy bag<\/a>"},"readTime":{"min":15,"sec":57},"status":"publish","excerpt":""},{"id":2629,"link":"https:\/\/vcareathome.com\/blogs\/are-physiotherapists-doctors","name":"are-physiotherapists-doctors","thumbnail":{"url":"https:\/\/vcareathome.com\/wp-content\/uploads\/2025\/05\/Are-Physiotherapists-Doctors.png","alt":"Are Physiotherapists Doctors"},"title":"Are Physiotherapists Doctors? Know the Truth Before You Book One","author":{"name":"Admin","link":"https:\/\/vcareathome.com\/blogs\/author\/admin"},"date":"May 29, 2025","dateGMT":"2025-05-29 07:42:48","modifiedDate":"2025-06-05 09:56:16","modifiedDateGMT":"2025-06-05 09:56:16","commentCount":"0","commentStatus":"closed","categories":{"coma":"<a href=\"https:\/\/vcareathome.com\/blogs\/category\/physiotherapists\" rel=\"category tag\">physiotherapists<\/a>","space":"<a href=\"https:\/\/vcareathome.com\/blogs\/category\/physiotherapists\" rel=\"category tag\">physiotherapists<\/a>"},"taxonomies":{"post_tag":"<a href='https:\/\/vcareathome.com\/blogs\/tag\/are-physiotherapists-doctors' rel='post_tag'>are physiotherapists doctors<\/a>"},"readTime":{"min":18,"sec":32},"status":"publish","excerpt":""},{"id":2586,"link":"https:\/\/vcareathome.com\/blogs\/caretaker-and-caregiver-aapake-lie-sahee-vikalp-kya-hai","name":"caretaker-and-caregiver-aapake-lie-sahee-vikalp-kya-hai","thumbnail":{"url":"https:\/\/vcareathome.com\/wp-content\/uploads\/2025\/05\/Caretaker-vs-Caregiver.png","alt":"Caretaker vs Caregiver"},"title":"Caretaker vs Caregiver: \u0906\u092a\u0915\u0947 \u0932\u093f\u090f \u0938\u0939\u0940 \u0935\u093f\u0915\u0932\u094d\u092a \u0915\u094d\u092f\u093e \u0939\u0948?","author":{"name":"Admin","link":"https:\/\/vcareathome.com\/blogs\/author\/admin"},"date":"May 19, 2025","dateGMT":"2025-05-19 09:36:08","modifiedDate":"2025-06-05 09:57:42","modifiedDateGMT":"2025-06-05 09:57:42","commentCount":"0","commentStatus":"closed","categories":{"coma":"<a href=\"https:\/\/vcareathome.com\/blogs\/category\/caregiver\" rel=\"category tag\">Caregiver<\/a>, <a href=\"https:\/\/vcareathome.com\/blogs\/category\/caretaker\" rel=\"category tag\">Caretaker<\/a>","space":"<a href=\"https:\/\/vcareathome.com\/blogs\/category\/caregiver\" rel=\"category tag\">Caregiver<\/a> <a href=\"https:\/\/vcareathome.com\/blogs\/category\/caretaker\" rel=\"category tag\">Caretaker<\/a>"},"taxonomies":{"post_tag":"<a href='https:\/\/vcareathome.com\/blogs\/tag\/caretaker-vs-caregiver' rel='post_tag'>Caretaker vs Caregiver<\/a>"},"readTime":{"min":22,"sec":15},"status":"publish","excerpt":""},{"id":2583,"link":"https:\/\/vcareathome.com\/blogs\/caretaker-vs-caregiver-guide","name":"caretaker-vs-caregiver-guide","thumbnail":{"url":"https:\/\/vcareathome.com\/wp-content\/uploads\/2025\/05\/Caretaker-vs-Caregiver.png","alt":"Caretaker vs Caregiver"},"title":"Caretaker vs Caregiver: What\u2019s the Right Choice for You?","author":{"name":"Admin","link":"https:\/\/vcareathome.com\/blogs\/author\/admin"},"date":"May 19, 2025","dateGMT":"2025-05-19 07:09:39","modifiedDate":"2025-06-05 09:59:08","modifiedDateGMT":"2025-06-05 09:59:08","commentCount":"0","commentStatus":"closed","categories":{"coma":"<a href=\"https:\/\/vcareathome.com\/blogs\/category\/caregiver\" rel=\"category tag\">Caregiver<\/a>, <a href=\"https:\/\/vcareathome.com\/blogs\/category\/caretaker\" rel=\"category tag\">Caretaker<\/a>","space":"<a href=\"https:\/\/vcareathome.com\/blogs\/category\/caregiver\" rel=\"category tag\">Caregiver<\/a> <a href=\"https:\/\/vcareathome.com\/blogs\/category\/caretaker\" rel=\"category tag\">Caretaker<\/a>"},"taxonomies":{"post_tag":"<a href='https:\/\/vcareathome.com\/blogs\/tag\/caretaker-vs-caregiver' rel='post_tag'>Caretaker vs Caregiver<\/a>"},"readTime":{"min":16,"sec":49},"status":"publish","excerpt":""},{"id":2413,"link":"https:\/\/vcareathome.com\/blogs\/mvi-injection-uses-benefits-and-side-effects","name":"mvi-injection-uses-benefits-and-side-effects","thumbnail":{"url":"https:\/\/vcareathome.com\/wp-content\/uploads\/2025\/05\/Home-8.png","alt":"MVI Injection: Uses, Benefits, and Side Effects"},"title":"MVI Injection: Uses, Benefits, and Side Effects","author":{"name":"Admin","link":"https:\/\/vcareathome.com\/blogs\/author\/admin"},"date":"May 16, 2025","dateGMT":"2025-05-16 05:42:13","modifiedDate":"2025-06-05 09:59:40","modifiedDateGMT":"2025-06-05 09:59:40","commentCount":"0","commentStatus":"closed","categories":{"coma":"<a href=\"https:\/\/vcareathome.com\/blogs\/category\/mvi-injection\" rel=\"category tag\">mvi injection<\/a>","space":"<a href=\"https:\/\/vcareathome.com\/blogs\/category\/mvi-injection\" rel=\"category tag\">mvi injection<\/a>"},"taxonomies":{"post_tag":"<a href='https:\/\/vcareathome.com\/blogs\/tag\/mvi-injection' rel='post_tag'>MVI Injection<\/a>"},"readTime":{"min":16,"sec":52},"status":"publish","excerpt":""},{"id":2556,"link":"https:\/\/vcareathome.com\/blogs\/taking-care-of-mom-at-home","name":"taking-care-of-mom-at-home","thumbnail":{"url":"https:\/\/vcareathome.com\/wp-content\/uploads\/2025\/05\/5-Smart-Ways-of-Taking-Care-of-Mom-at-Home.png","alt":"aking Care of Mom at Home"},"title":"5 Smart Ways of Taking Care of Mom at Home","author":{"name":"Admin","link":"https:\/\/vcareathome.com\/blogs\/author\/admin"},"date":"May 15, 2025","dateGMT":"2025-05-15 05:52:51","modifiedDate":"2025-06-05 10:00:15","modifiedDateGMT":"2025-06-05 10:00:15","commentCount":"0","commentStatus":"closed","categories":{"coma":"<a href=\"https:\/\/vcareathome.com\/blogs\/category\/elder-care\" rel=\"category tag\">elder care<\/a>","space":"<a href=\"https:\/\/vcareathome.com\/blogs\/category\/elder-care\" rel=\"category tag\">elder care<\/a>"},"taxonomies":{"post_tag":"<a href='https:\/\/vcareathome.com\/blogs\/tag\/taking-care-of-mom' rel='post_tag'>taking care of mom<\/a>"},"readTime":{"min":9,"sec":25},"status":"publish","excerpt":""},{"id":2518,"link":"https:\/\/vcareathome.com\/blogs\/low-voltage-on-ecg-meaning-causes-next-steps","name":"low-voltage-on-ecg-meaning-causes-next-steps","thumbnail":{"url":"https:\/\/vcareathome.com\/wp-content\/uploads\/2025\/05\/Low-Voltage-on-ECG-What-It-Means-When-to-Worry.png","alt":"Low Voltage on ECG What It Means & When to Worry"},"title":"Low Voltage on ECG: What It Means & When to Worry","author":{"name":"Admin","link":"https:\/\/vcareathome.com\/blogs\/author\/admin"},"date":"May 12, 2025","dateGMT":"2025-05-12 06:42:43","modifiedDate":"2025-06-05 10:00:42","modifiedDateGMT":"2025-06-05 10:00:42","commentCount":"0","commentStatus":"closed","categories":{"coma":"<a href=\"https:\/\/vcareathome.com\/blogs\/category\/ecg\" rel=\"category tag\">ECG<\/a>, <a href=\"https:\/\/vcareathome.com\/blogs\/category\/ecg\/low-voltage\" rel=\"category tag\">Low Voltage<\/a>","space":"<a href=\"https:\/\/vcareathome.com\/blogs\/category\/ecg\" rel=\"category tag\">ECG<\/a> <a href=\"https:\/\/vcareathome.com\/blogs\/category\/ecg\/low-voltage\" rel=\"category tag\">Low Voltage<\/a>"},"taxonomies":{"post_tag":"<a href='https:\/\/vcareathome.com\/blogs\/tag\/low-voltage-on-ecg' rel='post_tag'>Low Voltage on ECG<\/a>"},"readTime":{"min":16,"sec":44},"status":"publish","excerpt":""},{"id":2508,"link":"https:\/\/vcareathome.com\/blogs\/diet-plan-for-old-age-seniors","name":"diet-plan-for-old-age-seniors","thumbnail":{"url":"https:\/\/vcareathome.com\/wp-content\/uploads\/2025\/05\/7-Day-Diet-Plan-for-Old-Age-Seniors.png","alt":"7-Day Diet Plan for Old Age Seniors"},"title":"7-Day Diet Plan for Old Age Seniors","author":{"name":"Admin","link":"https:\/\/vcareathome.com\/blogs\/author\/admin"},"date":"May 8, 2025","dateGMT":"2025-05-08 04:32:16","modifiedDate":"2025-06-05 10:01:14","modifiedDateGMT":"2025-06-05 10:01:14","commentCount":"0","commentStatus":"closed","categories":{"coma":"<a href=\"https:\/\/vcareathome.com\/blogs\/category\/elder-care\/diet-plan-elder-care\" rel=\"category tag\">Diet Plan<\/a>, <a href=\"https:\/\/vcareathome.com\/blogs\/category\/elder-care\" rel=\"category tag\">elder care<\/a>","space":"<a href=\"https:\/\/vcareathome.com\/blogs\/category\/elder-care\/diet-plan-elder-care\" rel=\"category tag\">Diet Plan<\/a> <a href=\"https:\/\/vcareathome.com\/blogs\/category\/elder-care\" rel=\"category tag\">elder care<\/a>"},"taxonomies":{"post_tag":"<a href='https:\/\/vcareathome.com\/blogs\/tag\/diet-plan-for-old-age' rel='post_tag'>diet plan for old age<\/a>"},"readTime":{"min":13,"sec":56},"status":"publish","excerpt":""},{"id":2495,"link":"https:\/\/vcareathome.com\/blogs\/summer-activities-for-elder-at-home","name":"summer-activities-for-elder-at-home","thumbnail":{"url":"https:\/\/vcareathome.com\/wp-content\/uploads\/2025\/05\/10-Safe-And-Enjoyable-Summer-Activities-For-The-Elderly-At-Home.png","alt":"10 Safe And Enjoyable Summer Activities For The Elderly At Home"},"title":"10 Safe And Enjoyable Summer Activities For The Elderly At Home","author":{"name":"Admin","link":"https:\/\/vcareathome.com\/blogs\/author\/admin"},"date":"May 5, 2025","dateGMT":"2025-05-05 08:14:56","modifiedDate":"2025-06-05 10:01:33","modifiedDateGMT":"2025-06-05 10:01:33","commentCount":"0","commentStatus":"closed","categories":{"coma":"<a href=\"https:\/\/vcareathome.com\/blogs\/category\/summer\" rel=\"category tag\">Summer<\/a>, <a href=\"https:\/\/vcareathome.com\/blogs\/category\/summer\/summer-activities-for-elder\" rel=\"category tag\">Summer Activities For Elder<\/a>","space":"<a href=\"https:\/\/vcareathome.com\/blogs\/category\/summer\" rel=\"category tag\">Summer<\/a> <a href=\"https:\/\/vcareathome.com\/blogs\/category\/summer\/summer-activities-for-elder\" rel=\"category tag\">Summer Activities For Elder<\/a>"},"taxonomies":{"post_tag":"<a href='https:\/\/vcareathome.com\/blogs\/tag\/summer-activities-for-elder' rel='post_tag'>Summer Activities For Elder<\/a>"},"readTime":{"min":9,"sec":56},"status":"publish","excerpt":""},{"id":2486,"link":"https:\/\/vcareathome.com\/blogs\/spring-fruits-vegetables-elderly-health","name":"spring-fruits-vegetables-elderly-health","thumbnail":{"url":"https:\/\/vcareathome.com\/wp-content\/uploads\/2025\/04\/Best-Spring-Season-Fruits-Veggies-for-Elderly-Health.png","alt":"Best Spring Season Fruits & Veggies for Elderly Health"},"title":"Best Spring Season Fruits & Veggies for Elderly Health","author":{"name":"Admin","link":"https:\/\/vcareathome.com\/blogs\/author\/admin"},"date":"May 1, 2025","dateGMT":"2025-05-01 09:48:17","modifiedDate":"2025-06-05 10:01:47","modifiedDateGMT":"2025-06-05 10:01:47","commentCount":"0","commentStatus":"closed","categories":{"coma":"<a href=\"https:\/\/vcareathome.com\/blogs\/category\/spring-season\" rel=\"category tag\">Spring Season<\/a>","space":"<a href=\"https:\/\/vcareathome.com\/blogs\/category\/spring-season\" rel=\"category tag\">Spring Season<\/a>"},"taxonomies":{"post_tag":"<a href='https:\/\/vcareathome.com\/blogs\/tag\/spring-season-fruits-veggies' rel='post_tag'>Spring Season Fruits & Veggies<\/a>"},"readTime":{"min":9,"sec":55},"status":"publish","excerpt":""},{"id":2456,"link":"https:\/\/vcareathome.com\/blogs\/role-of-nurse-in-care-of-elderly","name":"role-of-nurse-in-care-of-elderly","thumbnail":{"url":"https:\/\/vcareathome.com\/wp-content\/uploads\/2025\/04\/1.png","alt":"Why the Role of Nurse in Care of Elderly Is Crucial"},"title":"Why the Role of Nurse in Care of Elderly Is Crucial","author":{"name":"Admin","link":"https:\/\/vcareathome.com\/blogs\/author\/admin"},"date":"Apr 25, 2025","dateGMT":"2025-04-25 10:41:04","modifiedDate":"2025-06-05 10:02:00","modifiedDateGMT":"2025-06-05 10:02:00","commentCount":"0","commentStatus":"closed","categories":{"coma":"<a href=\"https:\/\/vcareathome.com\/blogs\/category\/elder-care\" rel=\"category tag\">elder care<\/a>","space":"<a href=\"https:\/\/vcareathome.com\/blogs\/category\/elder-care\" rel=\"category tag\">elder care<\/a>"},"taxonomies":{"post_tag":"<a href='https:\/\/vcareathome.com\/blogs\/tag\/role-of-nurse-in-care-of-elderly' rel='post_tag'>Role of Nurse in Care of Elderly<\/a>"},"readTime":{"min":12,"sec":54},"status":"publish","excerpt":""},{"id":2434,"link":"https:\/\/vcareathome.com\/blogs\/nursing-care-plan-for-asthma","name":"nursing-care-plan-for-asthma","thumbnail":{"url":"https:\/\/vcareathome.com\/wp-content\/uploads\/2025\/04\/Home-7.png","alt":"How to Create a Nursing Care Plan for Asthma Patients"},"title":"How to Create a Nursing Care Plan for Asthma Patients","author":{"name":"Admin","link":"https:\/\/vcareathome.com\/blogs\/author\/admin"},"date":"Apr 21, 2025","dateGMT":"2025-04-21 09:28:54","modifiedDate":"2025-06-05 10:02:13","modifiedDateGMT":"2025-06-05 10:02:13","commentCount":"0","commentStatus":"closed","categories":{"coma":"<a href=\"https:\/\/vcareathome.com\/blogs\/category\/nursing-care\" rel=\"category tag\">Nursing Care<\/a>, <a href=\"https:\/\/vcareathome.com\/blogs\/category\/nursing-care\/plan-for-asthma\" rel=\"category tag\">Plan for Asthma<\/a>","space":"<a href=\"https:\/\/vcareathome.com\/blogs\/category\/nursing-care\" rel=\"category tag\">Nursing Care<\/a> <a href=\"https:\/\/vcareathome.com\/blogs\/category\/nursing-care\/plan-for-asthma\" rel=\"category tag\">Plan for Asthma<\/a>"},"taxonomies":{"post_tag":"<a href='https:\/\/vcareathome.com\/blogs\/tag\/nursing-care-plan-for-asthma' rel='post_tag'>Nursing Care Plan for Asthma<\/a>"},"readTime":{"min":27,"sec":9},"status":"publish","excerpt":""},{"id":2416,"link":"https:\/\/vcareathome.com\/blogs\/waterproof-wound-dressing-shower-safety","name":"waterproof-wound-dressing-shower-safety","thumbnail":{"url":"https:\/\/vcareathome.com\/wp-content\/uploads\/2025\/04\/Waterproof-Wound-Dressing-Stay-Safe-While-You-Shower.png","alt":"Waterproof Wound Dressing: Stay Safe While You Shower"},"title":"Waterproof Wound Dressing: Stay Safe While You Shower","author":{"name":"Admin","link":"https:\/\/vcareathome.com\/blogs\/author\/admin"},"date":"Apr 17, 2025","dateGMT":"2025-04-17 06:33:42","modifiedDate":"2025-06-05 10:02:41","modifiedDateGMT":"2025-06-05 10:02:41","commentCount":"0","commentStatus":"closed","categories":{"coma":"<a href=\"https:\/\/vcareathome.com\/blogs\/category\/wound\" rel=\"category tag\">wound<\/a>","space":"<a href=\"https:\/\/vcareathome.com\/blogs\/category\/wound\" rel=\"category tag\">wound<\/a>"},"taxonomies":{"post_tag":"<a href='https:\/\/vcareathome.com\/blogs\/tag\/waterproof-wound-dressing' rel='post_tag'>Waterproof Wound Dressing<\/a>"},"readTime":{"min":13,"sec":31},"status":"publish","excerpt":""},{"id":2407,"link":"https:\/\/vcareathome.com\/blogs\/mvi-injection-ke-upyog-fayde-side-effects","name":"mvi-injection-ke-upyog-fayde-side-effects","thumbnail":{"url":"https:\/\/vcareathome.com\/wp-content\/uploads\/2025\/04\/Home-5.png","alt":"MVI Injection \u0915\u0947 \u0909\u092a\u092f\u094b\u0917, \u092b\u093e\u092f\u0926\u0947 \u0914\u0930 \u0938\u093e\u0907\u0921 \u0907\u092b\u0947\u0915\u094d\u091f"},"title":"MVI Injection \u0915\u0947 \u0909\u092a\u092f\u094b\u0917, \u092b\u093e\u092f\u0926\u0947 \u0914\u0930 \u0938\u093e\u0907\u0921 \u0907\u092b\u0947\u0915\u094d\u091f","author":{"name":"Admin","link":"https:\/\/vcareathome.com\/blogs\/author\/admin"},"date":"Apr 14, 2025","dateGMT":"2025-04-14 11:52:20","modifiedDate":"2025-06-05 10:02:54","modifiedDateGMT":"2025-06-05 10:02:54","commentCount":"0","commentStatus":"closed","categories":{"coma":"<a href=\"https:\/\/vcareathome.com\/blogs\/category\/mvi-injection\" rel=\"category tag\">mvi injection<\/a>","space":"<a href=\"https:\/\/vcareathome.com\/blogs\/category\/mvi-injection\" rel=\"category tag\">mvi injection<\/a>"},"taxonomies":{"post_tag":"<a href='https:\/\/vcareathome.com\/blogs\/tag\/mvi-injection-uses-in-hindi' rel='post_tag'>mvi injection uses in hindi<\/a>"},"readTime":{"min":18,"sec":33},"status":"publish","excerpt":""},{"id":2394,"link":"https:\/\/vcareathome.com\/blogs\/ryles-tube-uses-guide","name":"ryles-tube-uses-guide","thumbnail":{"url":"https:\/\/vcareathome.com\/wp-content\/uploads\/2025\/04\/Home-4.png","alt":"Ryles tube uses: Purpose, Procedure & Safety Explained"},"title":"Ryle\u2019s Tube Explained: Uses, Procedure, and Key Parts You Should Know","author":{"name":"Admin","link":"https:\/\/vcareathome.com\/blogs\/author\/admin"},"date":"Apr 9, 2025","dateGMT":"2025-04-09 07:08:37","modifiedDate":"2025-06-05 10:03:08","modifiedDateGMT":"2025-06-05 10:03:08","commentCount":"0","commentStatus":"closed","categories":{"coma":"<a href=\"https:\/\/vcareathome.com\/blogs\/category\/ryles-tube\" rel=\"category tag\">ryles tube<\/a>","space":"<a href=\"https:\/\/vcareathome.com\/blogs\/category\/ryles-tube\" rel=\"category tag\">ryles tube<\/a>"},"taxonomies":{"post_tag":"<a href='https:\/\/vcareathome.com\/blogs\/tag\/ryles-tube-uses' rel='post_tag'>ryles tube uses<\/a>"},"readTime":{"min":18,"sec":27},"status":"publish","excerpt":""},{"id":2384,"link":"https:\/\/vcareathome.com\/blogs\/vital-monitor-machine-uses-benefits-and-how-it-works","name":"vital-monitor-machine-uses-benefits-and-how-it-works","thumbnail":{"url":"https:\/\/vcareathome.com\/wp-content\/uploads\/2025\/04\/What-is-a-Vital-Monitor-Machine-Uses-Benefits-How-It-Works.png","alt":"What is a Vital Monitor Machine Uses, Benefits & How It Works"},"title":"What is a Vital Monitor Machine? Uses, Benefits & How It Works","author":{"name":"Admin","link":"https:\/\/vcareathome.com\/blogs\/author\/admin"},"date":"Apr 7, 2025","dateGMT":"2025-04-07 05:35:43","modifiedDate":"2025-06-05 10:03:20","modifiedDateGMT":"2025-06-05 10:03:20","commentCount":"0","commentStatus":"closed","categories":{"coma":"<a href=\"https:\/\/vcareathome.com\/blogs\/category\/vitals-monitoring\" rel=\"category tag\">Vitals Monitoring<\/a>","space":"<a href=\"https:\/\/vcareathome.com\/blogs\/category\/vitals-monitoring\" rel=\"category tag\">Vitals Monitoring<\/a>"},"taxonomies":{"post_tag":"<a href='https:\/\/vcareathome.com\/blogs\/tag\/vital-monitor-machine' rel='post_tag'>Vital Monitor Machine<\/a>"},"readTime":{"min":9,"sec":26},"status":"publish","excerpt":""}]