


Hey there, friend! Feeling a bit lost with tracheostomy care? Maybe you’re up late, scrolling through endless articles, wondering if you’re doing everything right. Trust me, it’s okay to feel overwhelmed. Caring for someone with a tracheostomy tube is a big responsibility, and it comes with its own set of worries. You’re definitely not alone in this journey.
I know it can be emotionally draining. You want to provide the best care possible, but it’s tough when you’re constantly thinking about potential risks and complications. But remember, you’re doing an amazing job!
Keeping that tracheostomy tube clean is super important. A clean tracheostomy tube helps prevent infections, which can be really scary. Plus, it makes sure your loved one can breathe easily and comfortably. Nobody wants to feel like they’re struggling for air.
So, what will we cover in this guide? I’ll walk you through each step of cleaning the tube at home. We’ll talk about the stuff you’ll need, simple ways to clean, and what to do if something goes wrong. Think of this as a friendly chat, where we break down the process into easy, manageable steps. Together, we can make sure your loved one is comfortable and safe.
Understanding Tracheostomy Tubes
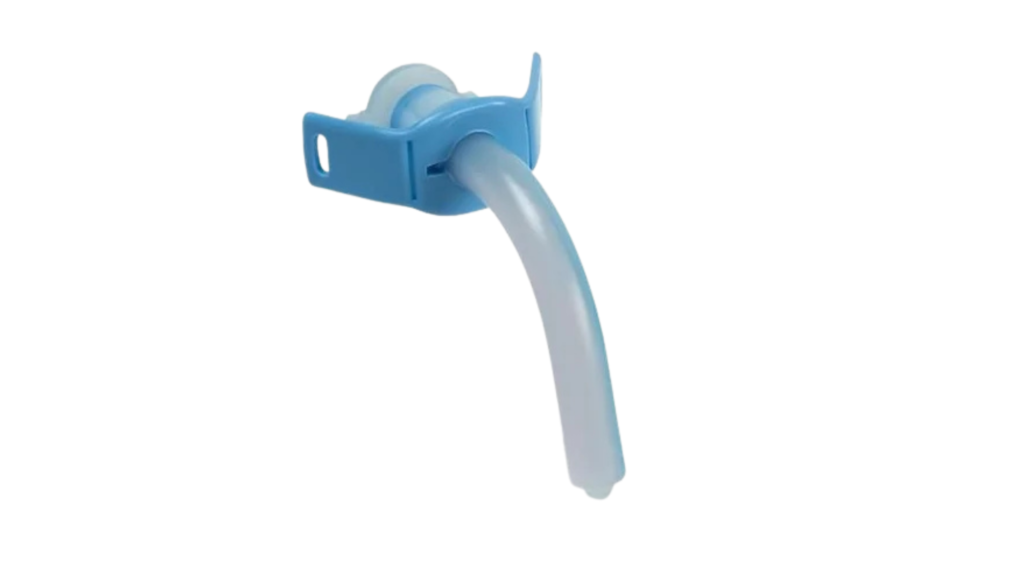
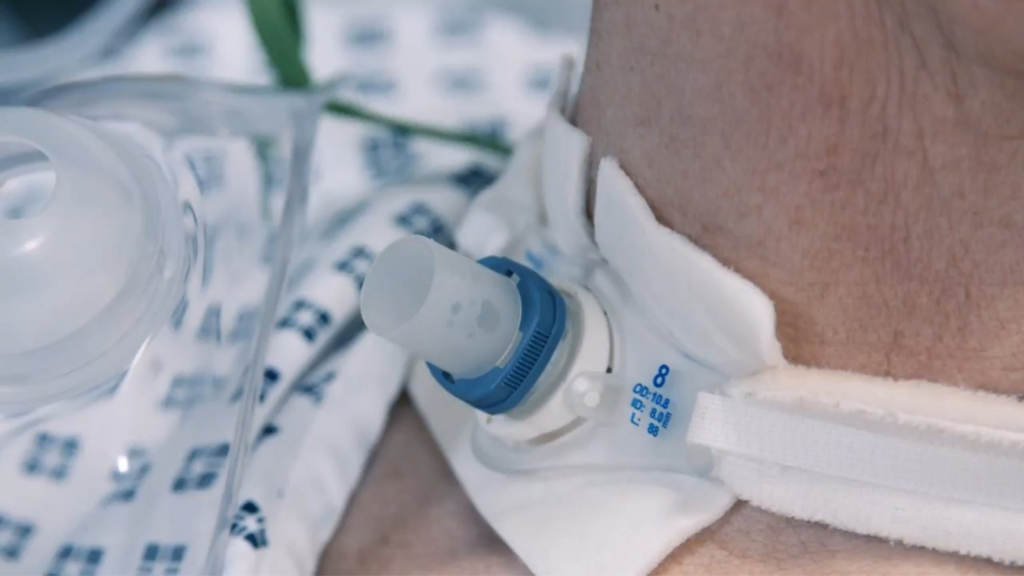
Okay, let’s dive into understanding tracheostomy tubes a bit better. Think of a tracheostomy tube as a special little helper that makes breathing easier when the usual pathways are blocked or need a break. It’s basically a small, curved tube that’s inserted into an opening in the neck, leading directly to the windpipe (trachea). This opening is called a stoma. The tube allows air to enter the lungs, bypassing the nose and mouth.
Now, let’s break down the different parts of a typical tracheostomy tube:
- Outer Cannula: This is the main part of the tube that stays in place. It keeps the stoma open.
- Inner Cannula: This is a removable part that fits inside the outer cannula. Think of it like a liner. It’s easier to clean, and if it gets blocked with mucus, you can quickly remove it without disturbing the outer cannula.
- Obturator: This is used when inserting the tracheostomy tube. It has a rounded tip that makes insertion smoother and less traumatic. Once the tube is in place, the obturator is removed.
So, why is cleaning so important? Imagine your tracheostomy tube as a doorway to your lungs. Just like any doorway, it can get dirty! Here’s why keeping it clean is essential:
- Preventing Infections: A dirty tube can harbor bacteria, which can lead to infections in the lungs. Nobody wants that!
- Maintaining Airflow: Mucus and secretions can build up inside the tube, making it harder to breathe. Regular cleaning keeps the airway clear.
- Reducing Mucus Buildup: Our bodies naturally produce mucus, but with a tracheostomy, this mucus can sometimes be thicker and harder to clear. Cleaning helps keep things manageable.
- Enhancing Overall Comfort: A clean tube is simply more comfortable. It reduces irritation and makes breathing easier, which can significantly improve your loved one’s quality of life.
Essential Supplies for Cleaning a Tracheostomy Tube
Alright, let’s talk about what you’ll need to keep that tracheostomy tube sparkling clean! Think of these supplies as your trusty toolkit for ensuring your loved one’s comfort and health. Having everything ready makes the process much smoother and less stressful.
First, here’s a list of the essentials:
- Clean Tap Water or Sterile Water: Water is the foundation of our cleaning process. While clean tap water is often fine, sterile water is even better for reducing the risk of infection.
- Mild Soap or Saline Solution: Gentle is key here! A mild soap (like baby soap) or a saline solution helps to loosen mucus and debris without irritating the delicate tissues.
- Hydrogen Peroxide (Check Compatibility): Hydrogen peroxide can be a great option for breaking down stubborn build-up, but it’s not suitable for all types of tracheostomy tubes, especially those made of sterling silver. Always check the manufacturer’s instructions or consult with a healthcare provider to ensure it’s safe for your specific tube.
- Small, Soft Brush or Pipe Cleaners: These little tools are perfect for getting into those hard-to-reach spots inside the inner cannula. Make sure the brush is soft to avoid scratching the tube.
- Gauze Pads: These are your go-to for wiping around the stoma site and cleaning the outer parts of the tracheostomy tube.
- Clean Container: A clean container is essential for soaking the inner cannula in soapy water or saline solution.
- Clean Towel: You’ll need a clean towel to dry the cleaned parts and keep your workspace tidy.
- Gloves (Non-Sterile): Wearing gloves helps protect both you and your loved one from germs during the cleaning process.
Now, where can you find all these supplies? Don’t worry, they’re usually easy to get:
- Medical Supply Stores: These stores specialize in medical equipment and supplies. They’re a great place to find specific items like tracheostomy tube cleaning kits and specialized brushes.
- Pharmacies: Your local pharmacy is a convenient option for many of the supplies, such as saline solution, mild soap, and gauze pads.
- Online Retailers: Online retailers offer a wide selection of medical supplies, often at competitive prices. Just make sure to choose reputable sellers and check customer reviews.
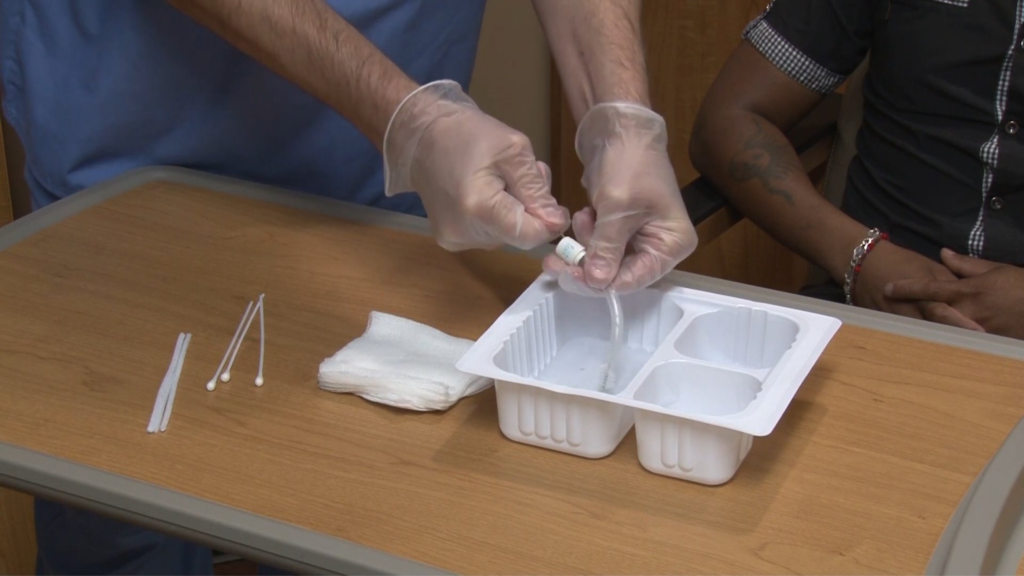
Step-by-Step Guide to Cleaning a Tracheostomy Tube at Home
Okay, friend, let’s get into the nitty-gritty of how to clean a tracheostomy tube at home. Don’t worry, I’ll break it down into simple steps. Think of it as a routine – like brushing your teeth, but for their airway!
A. Preparation (5 mins)
First things first, let’s get ready. Imagine you’re a chef preparing a meal; you need everything within reach!
- Wash your hands thoroughly: This is super important! Use warm water and soap, and scrub for at least 20 seconds. It’s like singing “Happy Birthday” twice.
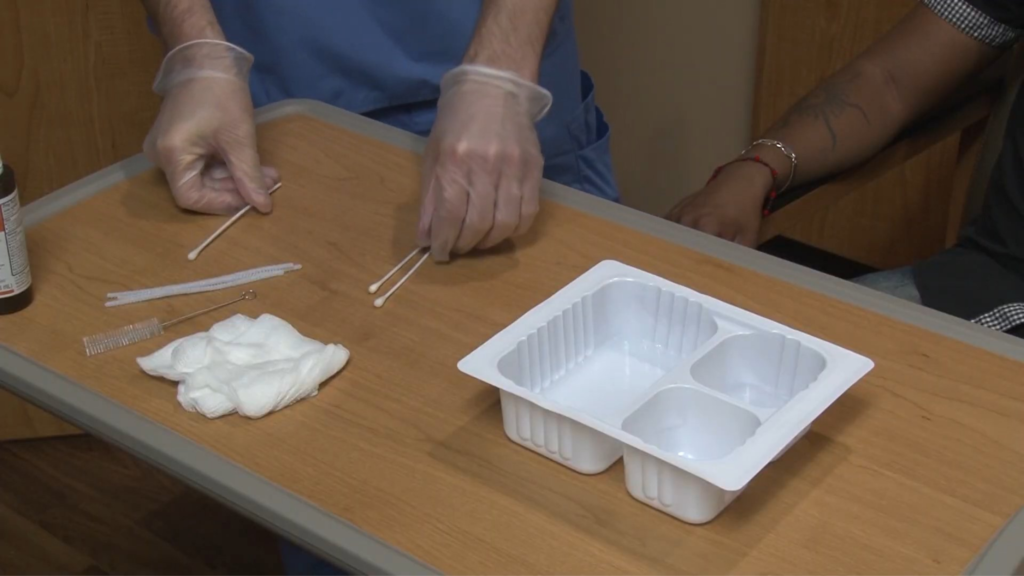
- Gather all necessary supplies: Get everything you need from your toolkit: clean water, mild soap or saline solution, your brush or pipe cleaners, gauze pads, a clean container, a clean towel, and gloves.
- Prepare a clean workspace: Clear a space on a table or countertop, and lay down a clean towel. This keeps everything hygienic and organized.
- Explain the procedure to the patient (if possible): If your loved one is able to understand, explain what you’re going to do. This can help ease their anxiety and make them more cooperative.
B. Removing the Inner Cannula (2 mins)
Time to gently remove the inner cannula, which is like taking out the filter from a coffee maker.
- Unlock and gently remove the inner cannula: Most inner cannulas have a locking mechanism. Turn it until you feel it release, and then gently slide the cannula out. Never force it!
- Inspect for any blockages or excessive mucus: Take a good look at the cannula. Is it clogged with thick mucus? Are there any signs of dried secretions? This will give you an idea of how thoroughly you need to clean.
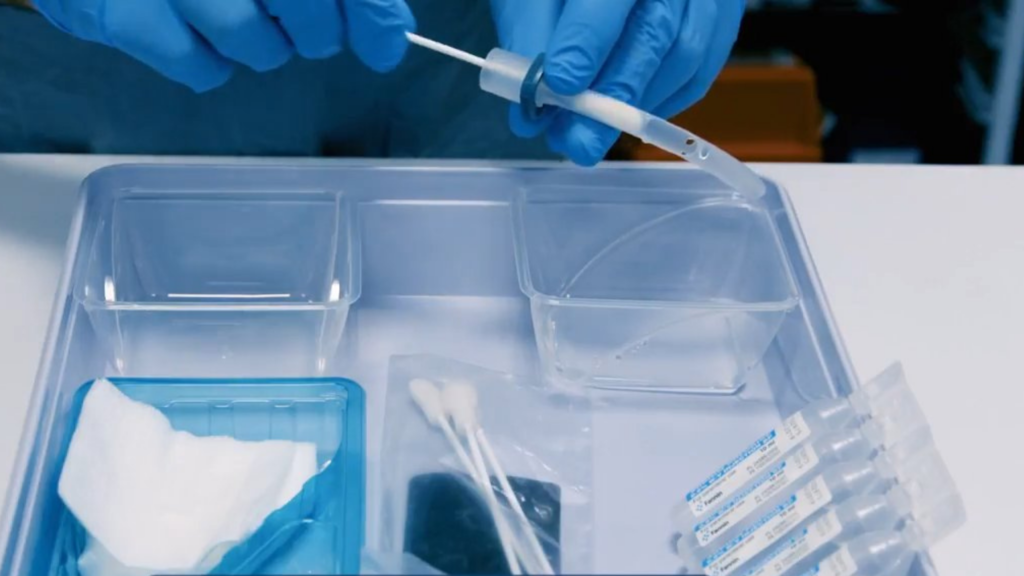
C. Cleaning the Inner Cannula (5-7 mins)
Now, let’s get that inner cannula squeaky clean!
- Soak the inner cannula in soapy water or saline solution: Place the inner cannula in your clean container filled with warm, soapy water or saline solution. Let it soak for a few minutes to loosen any stubborn mucus.
- Use a small brush or pipe cleaner to scrub the inside and outside: Gently scrub the inside and outside of the cannula with your small brush or pipe cleaner. Pay close attention to any areas with buildup.
- Rinse thoroughly with clean water: Hold the cannula under running water and rinse away all traces of soap or saline. Make sure the water flows through the entire length of the tube.
- Inspect for cleanliness: Hold the cannula up to the light and inspect it carefully. Is it completely clean? If not, repeat the scrubbing and rinsing process.
- Dry with a clean towel or let air dry: Gently pat the cannula dry with a clean towel, or let it air dry on a clean surface. Make sure it’s completely dry before reinserting it.
D. Cleaning the Outer Cannula (2-3 mins)
Don’t forget about the area around the stoma!
- Use a gauze pad soaked in saline solution to gently clean around the stoma site: Gently wipe around the stoma site with a gauze pad soaked in saline solution. Be careful not to get any solution inside the tracheostomy tube.
- Look for any signs of infection (redness, swelling, discharge): While you’re cleaning, check for any signs of infection. Redness, swelling, or unusual discharge should be reported to a healthcare professional.
- Dry the area thoroughly: Gently pat the area dry with a clean gauze pad.
E. Reinserting the Inner Cannula (1 min)
Almost there! Let’s put everything back together.
- Carefully reinsert the clean, dry inner cannula: Gently slide the clean, dry inner cannula back into the outer cannula.
- Lock it securely in place: Turn the locking mechanism until it clicks into place. Make sure it’s secure!
F. Securing the Tracheostomy Tube (2 mins)
Finally, let’s make sure everything is snug and secure.
- Check the tracheostomy ties for cleanliness and proper fit: Check the tracheostomy ties to make sure they’re clean and not too tight or too loose. You should be able to slip one finger comfortably between the tie and the neck.
- Replace if soiled or loose, ensuring the tube remains secure: If the ties are soiled or loose, replace them with clean ones. Make sure the tracheostomy tube remains securely in place throughout the process.
And that’s it! You’ve successfully cleaned a tracheostomy tube at home. Remember, consistency is key. By following these steps regularly, you can help keep your loved one comfortable and healthy.
Best Practices for Tracheostomy Tube Care
Alright, let’s talk about some of the best ways to keep that tracheostomy tube in tip-top shape! Think of these as your daily habits for ensuring the best possible care.
A. Frequency of Cleaning
So, how often should you be cleaning? Here’s a general guideline, but always follow your healthcare provider’s specific instructions:
- Inner Cannula: Aim to clean the inner cannula 1-3 times a day. This is the part that tends to get the dirtiest the quickest. Think of it like this: if you notice more mucus than usual, or if your loved one seems to be having a little more trouble breathing, it’s probably time for a cleaning.
- Outer Cannula and Stoma Site: The outer cannula and the skin around the stoma site should be cleaned daily. This helps prevent skin irritation and keeps the area free from infection.
B. Hygiene Tips
Hygiene is super important to prevent infections and keep your loved one healthy.
- Always wash your hands before and after the procedure: I can’t stress this enough! Washing your hands is the single most important thing you can do to prevent the spread of germs.
- Use clean supplies each time: Don’t reuse gauze pads, brushes, or pipe cleaners. Always start with fresh, clean supplies.
- Store clean and used supplies separately: Keep your clean supplies in a designated area away from used items. This prevents contamination.
C. Proper Disposal
Knowing how to safely get rid of used supplies is crucial for maintaining a clean environment.
- How to dispose of used supplies safely: Dispose of used gauze pads, gloves, and other disposable items in a sealed plastic bag. Follow your local guidelines for medical waste disposal.
D. Creating a Routine
Making tracheostomy care a regular part of your day can help reduce stress and ensure consistency.
- Establishing a consistent cleaning schedule: Try to clean the tracheostomy tube at the same time each day. For example, you could clean the inner cannula in the morning, afternoon, and evening.
- Involving the patient (if appropriate): If your loved one is able, involve them in the cleaning process. This can help them feel more in control and empowered. Even if they can’t physically help, talking them through the steps can make them feel more comfortable and less anxious.
Common Mistakes to Avoid
Okay, let’s chat about some common slip-ups people make when caring for a tracheostomy tube. Knowing these pitfalls can help you avoid unnecessary stress and ensure the best possible care!
- Using Harsh Cleaners: It might be tempting to reach for strong disinfectants, but trust me, that’s a no-go! Harsh cleaners like bleach or strong detergents can irritate the delicate tissues around the stoma and inside the airway. That’s why mild soap (like baby soap) or a saline solution is always the best choice. They’re gentle yet effective at removing mucus and debris.
- Neglecting Hygiene: I know you’re busy, but cutting corners on hygiene can lead to trouble. Always, always wash your hands thoroughly before and after handling the tracheostomy tube or any of the supplies. And make sure to use clean supplies each time. It’s like cooking – you wouldn’t use a dirty spoon to stir your food, right?
- Skipping Stoma Care: Cleaning around the stoma (the opening in the neck) is just as important as cleaning the tracheostomy tube itself. Mucus and secretions can build up around the stoma, leading to skin irritation and even infection. Gently cleaning the area with saline solution helps keep the skin healthy and prevents problems.
- Forcing the Tube: This is a big one! Never force the inner cannula or the entire tracheostomy tube in or out. If you encounter resistance, stop and reassess. Forcing it can cause injury to the trachea, which can be painful and lead to complications. Gentle handling is always the way to go.
- Ignoring Warning Signs: Pay close attention to any changes in the stoma site or your loved one’s breathing. Redness, swelling, unusual discharge, or difficulty breathing are all warning signs that something might be wrong. Don’t hesitate to contact a healthcare professional if you notice any of these issues. It’s always better to be safe than sorry!
Troubleshooting and When to Seek Help
Okay, let’s talk about some bumps in the road you might encounter and when it’s time to call in the cavalry. Remember, it’s always better to be cautious!
- Difficulty Removing the Inner Cannula: Sometimes, that inner cannula can be a bit stubborn. If you’re having trouble removing it, don’t force it! Try gently twisting it back and forth while applying slight pressure. Make sure you’ve unlocked it properly. If it still won’t budge, try instilling a few drops of saline solution into the tracheostomy tube to help loosen any dried secretions. If it remains stuck, contact your healthcare provider for guidance.
- Excessive Mucus Buildup: We all produce mucus, but sometimes it can feel like a never-ending waterfall! If you notice excessive mucus buildup, try increasing the frequency of suctioning. You can also try using a humidifier to keep the air moist, which helps thin the secretions. Encourage your loved one to cough to help clear the mucus. If the problem persists, talk to your healthcare provider; they may recommend a different suctioning technique or other interventions.
- Signs of Infection: Infections are a serious concern, so it’s important to be vigilant. If you notice any signs of infection, such as redness, swelling, unusual discharge (especially if it’s yellow, green, or foul-smelling), or fever, consult a healthcare professional right away. Early treatment can prevent the infection from spreading and causing more serious complications.
- Accidental Decannulation: This can be scary, but try to stay calm. If the tracheostomy tube comes out accidentally, it’s important to act quickly. If you’re trained to reinsert the tube, do so immediately. Use the obturator to guide the tube back into the stoma. If you’re not comfortable reinserting the tube, or if you’re having difficulty, call emergency services right away. In the meantime, try to keep the stoma open by gently inserting a clean, lubricated object, such as a suction catheter or the obturator itself.
- When to Call a Doctor: It’s always a good idea to err on the side of caution. Here are some specific symptoms that warrant medical attention:
- Persistent redness, swelling, or pain around the stoma site
- Unusual or foul-smelling discharge from the stoma
- Difficulty breathing, even after suctioning
- Fever of 100.5°F (38°C) or higher
- Changes in the color or consistency of secretions
- Any concerns or questions about tracheostomy tube care
Remember, you’re not alone in this journey. Don’t hesitate to reach out to your healthcare provider or a support group for guidance and support.
Emotional and Psychological Support for Caregivers
Okay, let’s have a heart-to-heart. Taking care of someone with a tracheostomy tube isn’t just about the physical tasks; it’s also about the emotional and mental load it carries. I see you, and I want you to know that your feelings are valid.
- Acknowledge the Stress: Let’s be real – this is tough stuff. It’s okay to feel overwhelmed, anxious, or even a little resentful at times. The responsibility of ensuring someone’s breathing is a huge weight to carry. You might be juggling medical appointments, cleaning schedules, and sleepless nights, all while trying to maintain some semblance of a normal life. It’s a lot! Acknowledging these challenges is the first step in taking care of yourself.
- Importance of Self-Care: You can’t pour from an empty cup. It’s so important to prioritize your own well-being, even when it feels impossible. Self-care doesn’t have to be extravagant; it can be as simple as taking a 15-minute break to read a book, going for a walk, or enjoying a cup of tea in silence. Find small ways to recharge your batteries so you can continue to provide the best care possible. Remember, taking care of yourself is not selfish; it’s essential.
- Finding Support Groups: You’re not alone in this journey. Connecting with others who understand what you’re going through can be incredibly helpful. Support groups offer a safe space to share your experiences, ask questions, and receive encouragement from people who truly get it. You can find support groups online or in your local community. Ask your healthcare provider or search online for “tracheostomy caregiver support groups” in your area.
- Seeking Professional Help: Sometimes, the stress and emotional toll can become too much to handle on your own. If you’re feeling consistently down, anxious, or unable to cope, consider seeking professional help. A therapist or counselor can provide you with tools and strategies to manage your emotions, cope with stress, and improve your overall well-being. There’s no shame in asking for help; it’s a sign of strength.
Conclusion
Alright, we’ve covered a lot, haven’t we? Let’s quickly recap the key points. Remember, keeping that tracheostomy tube clean involves gathering the right supplies, following a gentle step-by-step cleaning process, sticking to a consistent routine, and knowing what to watch out for.
Now, take a deep breath. You’ve got this! With the knowledge you’ve gained from this guide, you can confidently manage tracheostomy care at home. It might seem daunting at first, but trust yourself and remember that every small step you take makes a big difference in your loved one’s comfort and well-being.
So, what’s next? Start putting these tips into practice. Create a cleaning schedule that works for you, gather your supplies, and don’t be afraid to ask for help when you need it. The more consistent you are with your care routine, the easier it will become.
Finally, if you found this guide helpful, please share it with other caregivers who might be feeling overwhelmed. Leave a comment below with your questions or experiences – let’s support each other! And of course, always consult your healthcare provider for personalized advice and guidance. They are your best resource for ensuring the best possible care.
FAQs About Cleaning a Tracheostomy Tube
Q1: How often should I clean the inner cannula?
A: Typically, the inner cannula should be cleaned 1-3 times daily, or more often if there is excessive mucus buildup.
Q2: Can I use tap water to clean the tube?
A: Clean tap water is generally safe, but sterile or distilled water is preferred to minimize the risk of infection.
Q3: What should I do if the stoma site looks red or irritated?
A: Gently clean the area with saline solution and ensure it is thoroughly dry. If the redness persists or worsens, consult your healthcare provider.
Q4: How do I know if the tracheostomy tube is properly secured?
A: The tracheostomy ties should be snug enough to hold the tube in place but loose enough to allow one finger to fit comfortably between the tie and the neck.
Q5: What if I accidentally pull the tracheostomy tube out?
A: Stay calm. If you are trained to reinsert the tube, do so immediately. If not, call emergency services right away.
Q6: Can I use over-the-counter creams on the stoma site?
A: It’s best to avoid over-the-counter creams unless specifically recommended by your healthcare provider. They may cause irritation or infection.


